Saturday, March 31, 2012

Project Life: week 4

I'm back with another Project Life week spread. I totally love this project! I apologize, you will have to excuse my slightly grainy photos.. Didn't have a regular camera handy.

My brother and Heather have been bringing Kori and the kids over for regular visits, which I love! A very simple week as far as embellishing goes. I like that I can add little bits here and there but not spend hours stressing over adding pretty stuff. I'll save that for full 12x12 layouts.

A little washi and a bit of stamping is all I did this week and that's ok with me.

The biggest amount of my embellishing was on my week title. I really enjoy creating these. Another Hero Arts background stamp, AC washi and thickers. Ditto circle label, and a fiskars butterfly punch.

Another Marcy Penner journaling card and some washi + tiny attacher adorn a card about the malfunctions of my Instax :( not sure what the deal is there.

Thickers, twine, and SMASH card representing my obsessions with the campus Einstein's.

The family came over for a fun dinner complete with die cut mustaches and specs! They had so much fun with this.


I had this speech bubble die cut with my silhouette, however the color didn't match. Instead used it as a stencil and traced around it. Created a fun sketchy look.

Simple and fast is what is making this project work for me. What do you love most about it? I'll be back tomorrow for a run down of week 5! Hope you'll join me. Feel free to leave a link to your albums, I'd love to take a look!


Project Life: Week 3

I'm on a roll here with these posts! Hopefully I can keep this up all the way through!

I liked my balance of pictures and words for week 3. Neither overpowering the other. it was a pretty normal week for me with the exception of my parents anniversary that we celebrated at Kobe's Steakhouse. 30 years! I hope one day to have a marriage as loving and rewarding as theirs has been all of these years!

I left my embellishments pretty minimal on the spread, leaving the focus on the pictures and stories.

More washi and my silhouette for e week's title. I love this method of diecutting my title so that I can make the letters large and bold. I also used ine of my all time favorite Hero Arts back ground stamps. This wood grain pattern is trendy and versatile.

Plenty more journaling cards by Marcy Penner. Totally loving these! Some thickers and a heart punch finish off the last one.

Cut a circle from my coffee's cardboard sleeve to embellish my square on missing daily Einstein's at school. Another Marcy Penner card and October Afternoon sticker finish it off.

I later filled in this empty square with a little embellishing. A new Studio Calico background stamp, house shape stamped with that same wood grain stamp, rhinestones, and American Crafts thickers and rose ribbon to finish it off.

Did some stamping on a plain white card. Loving these days of the week stamps! They will definitely be making more appearances in my album. A picture of the cute little jacket I bought for Kori at Target this week. A little big now..but it was on SALE! She'll grow into it right?!?!

That sums up week 3! I'll be back tomorrow with an overview of week 4!


Friday, March 30, 2012

Project Life: Week 2

I'm back to share my second week of Project Life!


This was an exciting week for my family! My brother's fiancé gave birth to a beautiful baby girl, Kori Nisa Smith! The spring semester of classes also started for me this week!

I was still on my streak with those fringe scissors, creating that little celebrate square. My silhouette still getting plenty of use, die cutting phrases. I left the square blank so the "one little week" from week one remained partially transparent. The backwards text doesn't bother me, I think it's interesting. Other little bits and pieces here and there.


Here I used a journaling card by Marcy Penner, October Afternoon label stickers, and a Hero Arts typewriter stamp. More pictures from the hospital with Kori. Making an elaborate blanket tent in the living room with Chris and my niece and nephews. 4 knitted hats from etsy I ordered for Kori!

I used a Hero Arts background stamp for my week title+American Crafts washi+silhouette word and number. Love this color combo!!

A little square with Kori's birth details.

That sums up another week's spread down! Swing back by tomorrow for an overview of week 3! Slowly working my way to being caught up day by day!


Thursday, March 29, 2012

Project Life:Week 1

I didn't take a large amount of pictures the first week this year. I was still deciding between projects to take on this year..I didn't actually start putting together my Project Life until late February-ish.

There was still a lot going on the first week though. New Years with Chris at my Uncle Kent's then his parents to learn pitch. My Silhouette Cameo came in the mail. Trip to Archiver's and dinner at Elephant Bar. Renewed my plates. Ordered Scrapbook Trends subscription! Mom hand stitched boots for my niece expected later that month.

My new silhouette got a lot of use this week! Another Marcy Penner journal card for my week title + beloved washi.
Absolutely in love with these travel mug image from the Silhouette Studio! Office supply date stamp in the middle. Journal card from Smash. Loving splashes of Mr. Huey's here and there.

"One Little Week" quote freebie from Ali Edwards. Left it in the pocket alone so the next week peeks through. Love that!

This pretty much sums up week one! Thanks for stopping by! Tomorrow I will continue the series with week 2!


Project Life: Title Page

In the next few posts I am going to share my Project Life 2012 album with you thus far. I am going to start with my title page, which I absolutely love! These posts will be much less wordy than the last 2, filled instead with mostly pictures and a few brief descriptions here and there! Here we go....


I love how bright my title turned out...despite having a white base! I hope to continue the bright, cheerful feel thought the album...it reflects my overall personality and view on life, which I love! I think this title is so "me."


I loved the idea of the year being large across the span of the page so I diecut it using my Silhouette Cameo at roughly 4x12(slightly smaller) and glued it to a piece of white card stock. After embellishing that area with sewn on fringed scraps using Martha Stewart fringe scissors and Mr. Huey's mist, I cut the piece into two 4x6 squares to fit in the pocket!


I further titled my page with thickers, stitched across, more fringe (loving those scissors that day), and some stamping+more stamping! Next, I had extra scrap fringes that I cut across to make quick confetti for a pocket+a butterfly punch here and there thrown in. An "S" for Smith atop a journaling card by Marcy Penner...love this set..pretty sure they are the root of my now full-blown journalist card obsession! These cards were my first..and still favorite purchase for this project! That completes the first row.

The next row starts with a Smash journal sheet discussing my reason for starting this journey. The house stamp is by Unity, embossed with Zing (my favorite color!) The "remember" journal stamp is from an old Scarlet Lime kit. Finally I ended my title with a quote card by Smitha Katti.

Thanks for stopping by! I hope you will return tomorrow for my post on week 1!


Wednesday, March 28, 2012

Project Life: Organizing the Loot

**PRE-POST DISCLAIMER** The organization methods you are about to see are not, in any way, fancy or perfect. I am in a "split living" situation as a college student (last year YAY!) and am working with the limited space available at the moment.* HA!

I have posted previously about my scrapbook studio at my parent's house quite awhile back, (although I've made changes and need to repost that soon...another to do on a mile long list) however, I have recently unofficially moved in with my boyfriend at his apartment while we save for a house of our own. I am here enough that I could justify bringing some of my scrapbook stuff with me. (mostly things I will use for Project Life. I go "home" to my parents when I want to do full layouts) I wanted to show what I was using here at Chris's to demonstrate a way to make do with a smaller space.


After graduating high school, I purchased a bunch of these white cubes from target for around $25 each. I believe Hobby Lobby or Michael's now carries something similar. They work great for organizing all sorts of supplies and come in many styles. These drawers are large enough to fit a little over a 12x12 sheet of paper which is great!

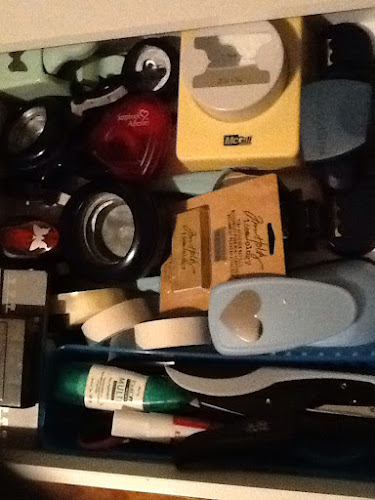
My top, left drawer is filled with adhesives and tools. The drawer isn't much more organized than that. There is a good mix of my favorite punches, adhesives, pens, and scissors floating around in there somewhere. Ha!


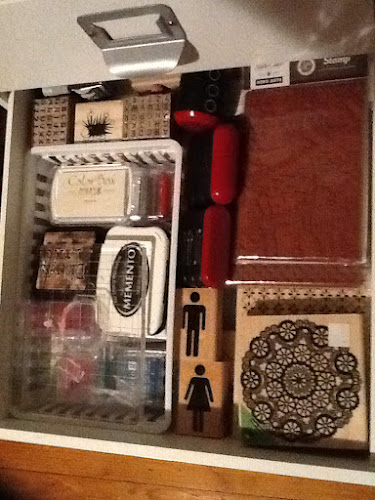
The next two drawers on the left are dedicated to stamping. The first houses a handful of inks, (most are Studio G from Walmart, plus a couple other favorites) although, the majority of my inks are back at my parents. I also keep background type stamps in the drawer, along with a few wood mounted ones. I am really loving the new stamp sets from Studio Calico! They are getting a lot of use in this project. The third drawer is a random mix of more favorite stamps that lend themselves well to this project and broad themes.


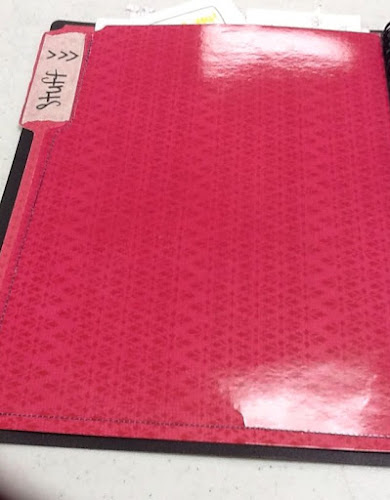
The fourth drawer on the left is home to my letter stickers. It is stocked full of letter stickers. It is hard to tell in the picture (should have rearranged things for the picture...note to self in the future Ha!) but under that 12x12 Echo Park sticker sheet there are piles of Thickers and other letter sticker packages. I might have an obsession with those.. The glitter ones are my current favorite ones right now..you'll notice in my week spreads soon.


The fifth drawer houses my washi tape, twine, and rhinestones. The washi tape and twine is separated in the drawer with an old wooden cheese box. At is the only extra organization I have within the drawer. Washi and twine get used on pretty much every spread so I like being able to pull the cheese box out of the drawer and bring it to wherever I am working (usually the floor..occasionally the coffee table).


The bottom left drawer has a mix of scrap patterned paper that relatively coordinate my bright theme for the Album. Definitely no organization in that drawer. It's not my entire stash so it's no big deal to sift through the whole pile quickly for what I need.


The top right drawer is stuffed full of a random mix of journaling stuff. Everything from labels to 3x4 cards...and anything in between...related to journaling. So far I don't have any further organization for that, however, I am considering different options possibly. For now it is getting the job done.


Under that drawer is other embellishment products. Little bits and pieces I pulled from my main stash that I thought I'd want for the project. I find myself occasionally thinking of something else I wished I brought over from my parents, this drawer continually grows each time I visit their house! Ha!


The last drawer holds collection kits and a few favorite papers. I really like Echo Park's collection kits, so several of those are in this drawer.


Underneath the drawers is a square opening in which I put a black canvas bin from Walmart. This bin is a catch all for things I don't have a place for. I don't print to many pictures that I'm not ready for, however the few I have are in here until I use them, computer paper and white card stock is in here as well. I don't have any colored card stock at Chris's, other than scraps, because I use mostly white for my backgrounds with stamps. I also keep protectors, memorabilia, and my paper trimmer here! The top of the cubes is just big enough for my simple, cheap printer (printing pictures at Walmart or Snapfish if I plan enough in advance) and my actual album!


And that is my current organizing methods! I am constantly reorganizing as I find things that aren't working or as my stash grows. And sometimes just because I'm bored (I'm one of those weird people who actually enjoys organizing). I hope you found someone useful from this post and will join me tomorrow as I start sharing my progress so far this year!


Sunday, March 25, 2012

Project Life: Planning

FINALLY! I'm not sure why, but I have typed.and retyped. put off. and procrastinated writing this post. I knew what I wanted to accomplish...share my project life journey in a series of posts with a background in how I plan and organize for this new adventure. So FINALLY. No more silly excuses. I AM GOING TO FOLLOW THROUGH THIS TIME.

*A special thanks to the IPAD app Blogsy for removing the validity in my excuses and making me face my fears* HA!

So...without further ado...

PROJECT LIFE POST #1: PLANNING

The end of last year I made the decision to take on the project life journey for 2012. (probably the best/easiest decision I've made HA!) After making this decision my next immediate thought? "This is going to take some serious planning..and detailed notes!" Off to Wal-Mart I went for a new planner.

Important things to consider: must be big enough to keep everything in one place. appointments and important dates. homework assignments for the new semester. day to day detailed notes for the album. yet it needed to be small enough to fit in my purse. (which if you saw the size of my purse...this isn't much of a stipulation. HA!) Here is what I came up with:


RULE #1 TO MAKING THIS WORK: keep a camera and your planner on you at ALL TIMES

The monthly calendar spread works perfectly for assignments, appointments, and important dates. The weekly layout with larger daily squares? You guessed it...new home for all the notes and happenings Project Life related. My planner uses a Monday to Sunday week, so my album will follow suit. (because let's face it..who wants to flip between two pages when working on a week's spread?!)


(I almost always have little notes attached to my planner..I'm a list maker..paper clips and I are well acquainted. HA!)

When I scrapbook, I love working with sketches! They give me a plan. A jump start to create. Do I always follow them in the end? Nope. But that's not my point for them. Project Life was no exception for me. I knew I would probably put each week together all in one sitting. My schedule wouldn't allow it any other way really. I do, though, have time throughout the week to fill in a sketch. Good ol' plain post-it notes work wonders. Each week, I stick 2 post-its somewhere on the week's pages. (they're moveable after all) I'm using Project Life design A protectors, so I doodled that layout on my post-its with a sharpie pen. I fill in the squares with a pencil (I move things around a lot. Erasing is essential) with the planned contents for that pocket. If I have an insert that week, additional post-its are added.


So far this has worked great for me. I feel like this takes the stress away when I sit down to put it all together. Having the sketch to go by speeds the process up so I can spend the extra time embellishing and making it pretty!

I love that Project Life is a place to include everyday moments and the "stuff" that makes up our lives. I needed a place to keep all of that stuff together, as I collect it. I stitched a little file folder together on 3 sides, making a pocket. Using glue dots, I attached it to the inside of my planner to store all the little bits I collect throughout the week.


When I put together my pages I also check both facebook and twitter for posts I might want to include.

My planner and method of keeping track of everyday events are nothing fancy, but they are working for me. I hope that after this post, you may have found something useful that will help make this journey easier for you. Check back tomorrow for a post about how I organize my supplies!